Custom UITableViewCell in IB
Custom cells are an extremely useful UI element to use in apps that I have been using since the start of iOS development and I wrote a tutorial (below) to show how to create custom cells in IB. Since then, there has been a lot of development around frameworks and libraries for custom cells. I’ve recently written a review of Sensible Cocoa’s Sensible TableView which might be of interest to readers. I think that Sensible Cocoa’s Sensible TableView is a very decent library to use if you want to quickly create a table view hierarchy that displays complicated data sets.
![]()
Creating the project
Create a new project with the “View-based Application” template and call it CustomTableCell.
Setting up the view controller
Open CustomTableCellViewController.h and add two IB outlets which we will use to reference to the custom UITableViewCell objects which we will create later. Also, we are going to be using this as a table view delegate and data source so we should state that this class will conform to these protocols. Your CustomTableCellViewController.h should look like this after editing:
1 2 3 4 5 6 7 8 | |
Adding the items in Interface Builder
Open CustomTableCellViewController.xib and drop in a Table View (not a Table View Controller), making it fill the view.
Set the the table view properties to Style –> Grouped.
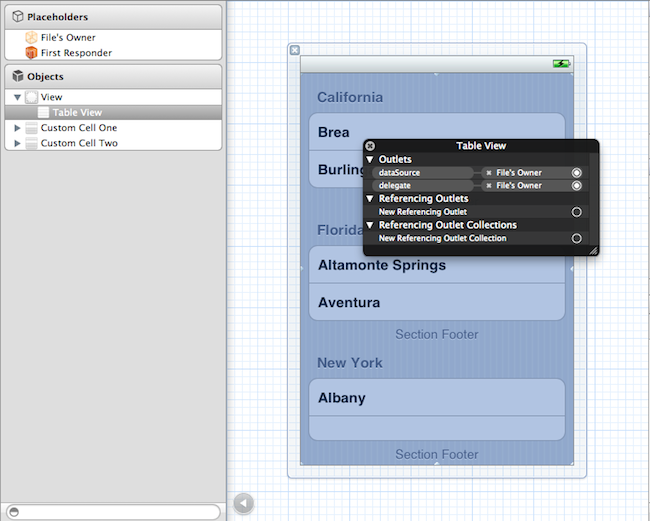
Link the delegate and dataSource outlets of the table view to “File’s Owner” as illustrated by this screenshot:
Add two Table View Cell items in IB to your CustomTableCellViewController.xib file. Then, open each table view cell item and drop something different onto each one of them so you will tell them apart.
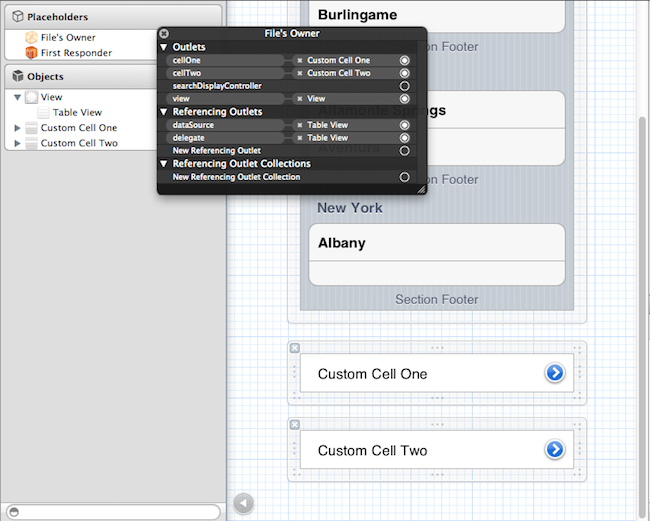
Now we need to link these table view cells to the IB outlets we created earlier. To do this, right click on “File’s Owner” and link cellOne and cellTwo outlets to the table view cells you have just created. You should then have something which looks like this:
Save and close CustomTableCellViewController.xib.
Controller Code
Open CustomTableViewController.m
We will need to implement three functions, namely tableView:cellForRowAtIndexPath:, numberOfSectionsInTableView: and tableView:numberOfRowsInSection: which are the usual data source protocol functions which we need to implement. The three functions are shown below.
1 2 3 4 5 | |
1 2 3 | |
1 2 3 | |
These functions tell the table view to display 1 section, with 2 cells and when the table view asks for each cell, the custom UITableViewCell objects are returned.
And that’s it!
If you now build and run the application then you will notice that your custom cells are being shown – brilliant! Now you can do something fun with the custom cells! For instance you could put a text box or a slider in it and then bind actions of it to a function in your view controller to act upon the user’s input.
Like I mentioned before though, I do suggest using something like Sensible Cocoa’s Sensible TableView if you want to create much more customisable table views than you can do yourself. They even have mechanisms for using Interface Builder which, like my tutorial here, I find very useful.
Updates
- EDIT: – Updated for Xcode 4
- EDIT: – Updated for latest code styling